Instructions for WTECII system (two digits on Your shift selector)
Recommended tools :
For 1992, 1993, 1994, and early 1995 models if experiencing erratic or no display; especially when there is cold weather or have retrieved any trouble codes. Have you seen code 69-32 already? Stop troubleshooting = 100% defective ECU!
Assemble 12V/15-25W light bulb (spare brake lamp bulb or similar – #1156, #1073 etc.) with 20 gauge solid copper wire (ordinary hookup or “bell wire”). Strip 1/2″ on test side. When you check ECU connectors, the lamp must glow bright white light. A dim light will indicate a bad connection somewhere; likely due to oxidization. A voltmeter will not indicate bad connections. An ordinary voltmeter or VOM isn’t reliable for this test. However you will need one to check the lower voltage systems.
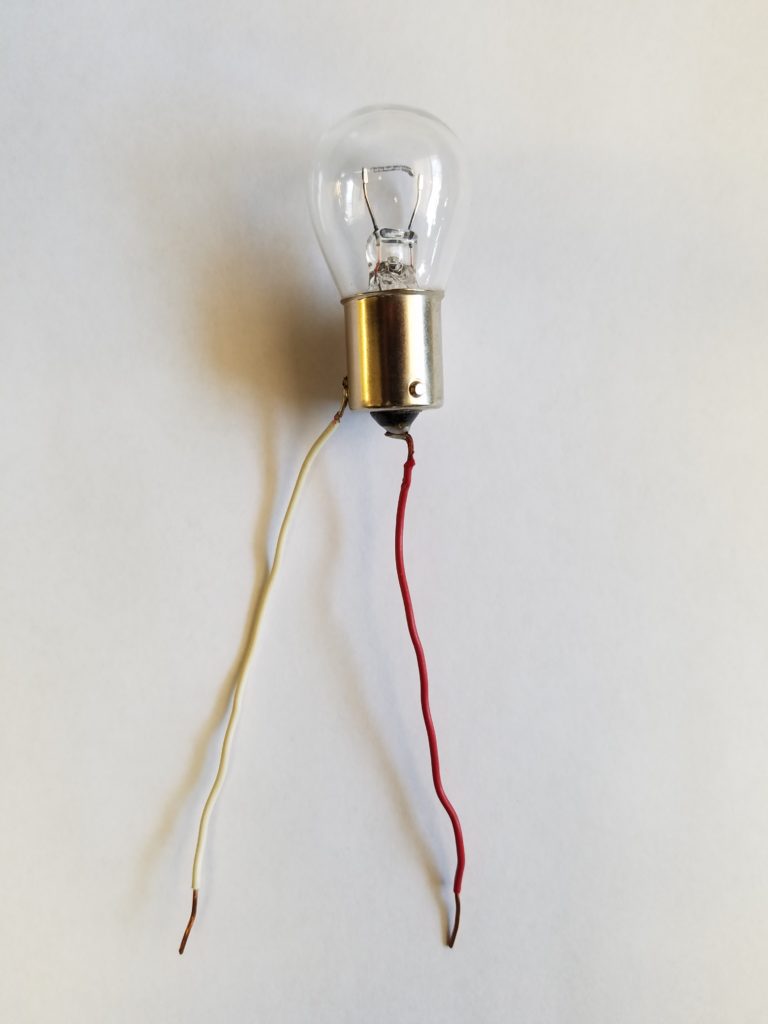
After assembly, check lamp directly on your battery terminals. Caution lamp will become HOT!
Always disconnect the battery or turn off the battery switch (Power Train Battery) prior to disconnecting or reconnecting ECU connectors!
Locate the ECU (in most RV’s the ECU is mounted directly to the shift pad). If remote shift selector is used, ECU may be nearby, close to VIM Module or mostly on trucks is mounted close to the transmission (just follow bundle of wires from transmission).
Disconnect the battery first, then unplug the two oval shape ECU connectors and reconnect the battery. Check the B connector with black plastic
rear side for the numbers (the other side backing A connector is either white or blue).
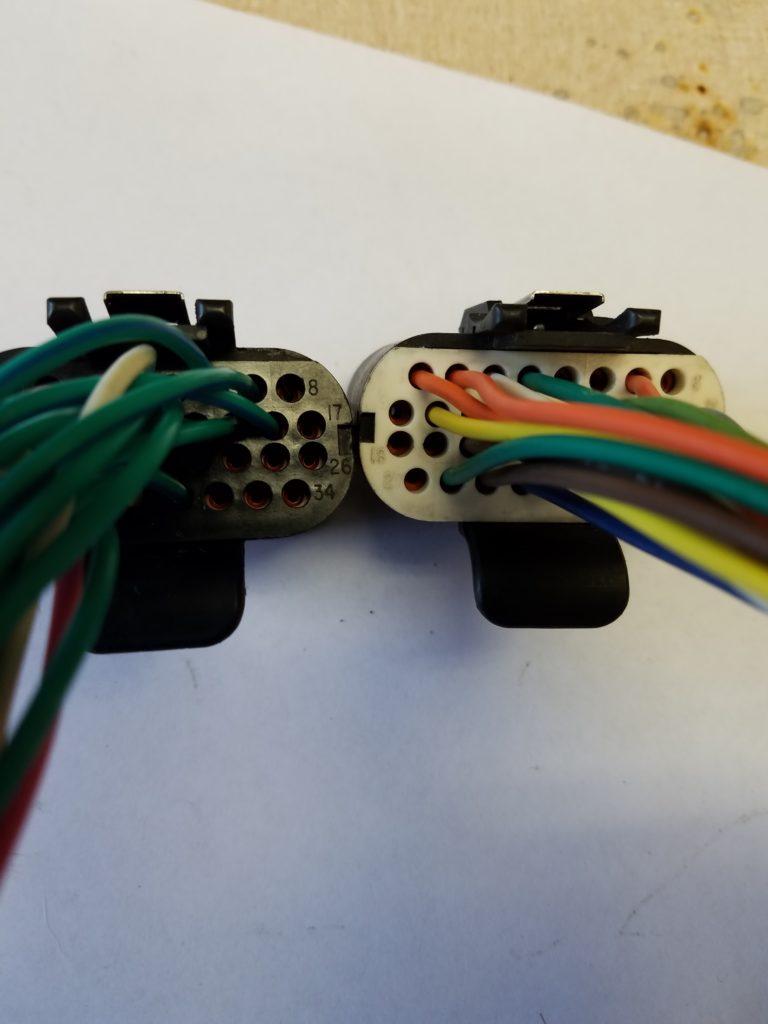
Only 8 numbers from 34 are imprinted (both sides of the row). Insert test lamp leads into corresponding B connector sockets: 9 and 2 then 18 and 11.
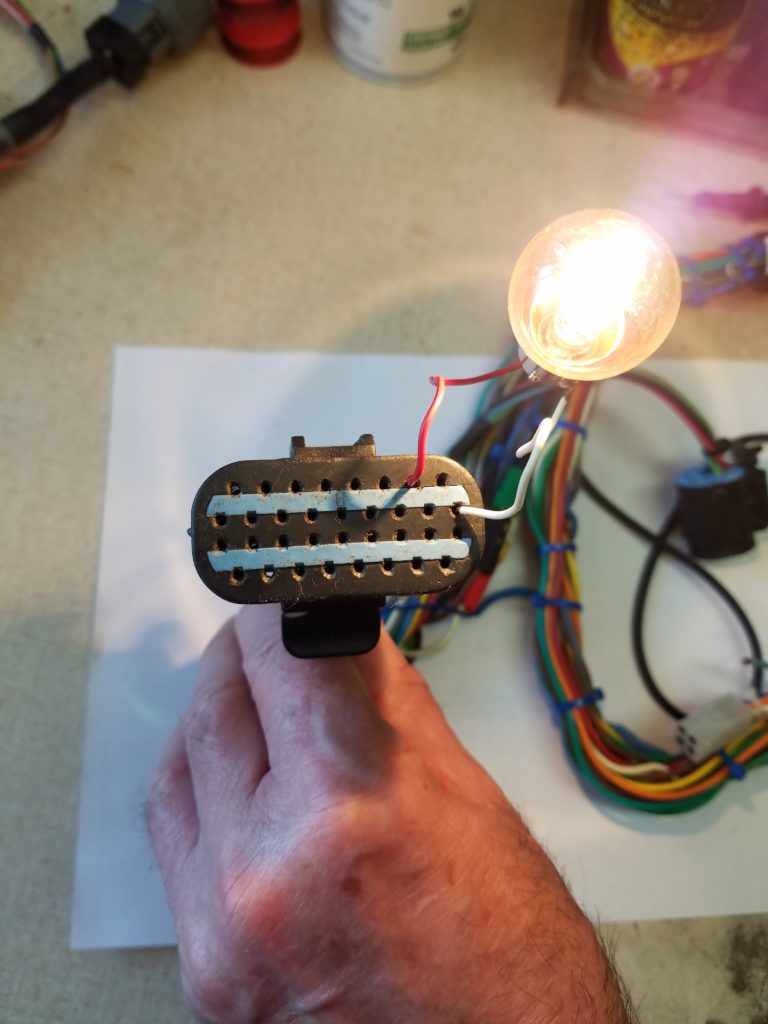
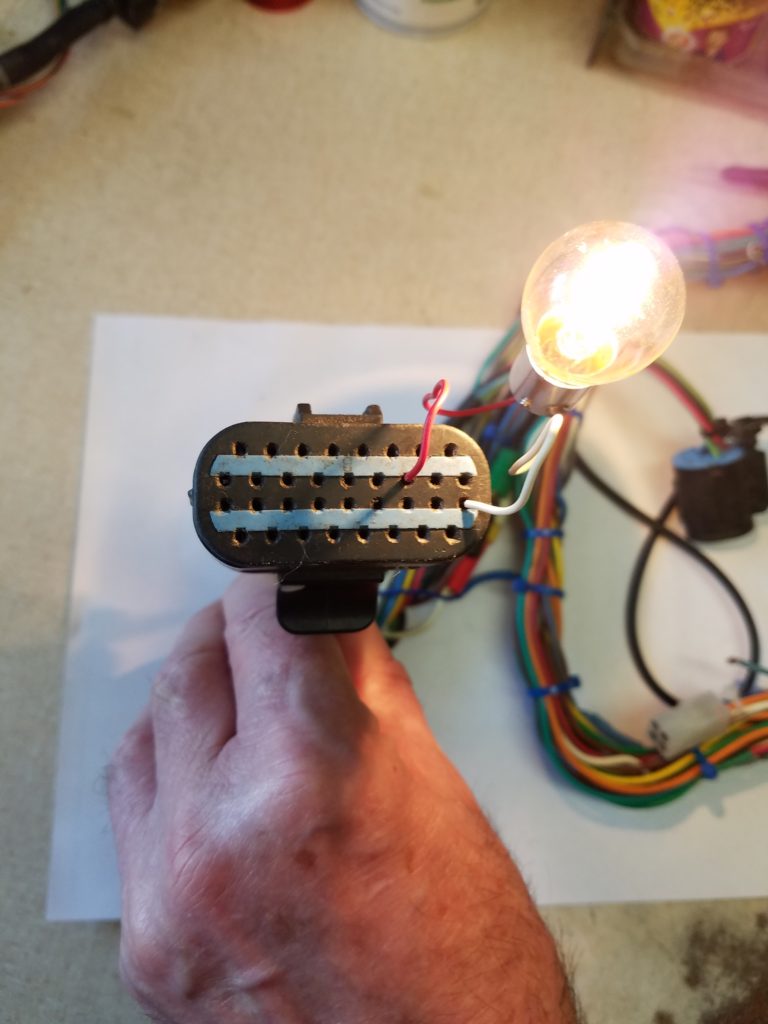
Next turn “ON” Ignition switch and insert test leads to 9 and 12. #9; #18 = BATTERY GROUND; #2; #11 = BATTERY POWER; #12 = IGNITION
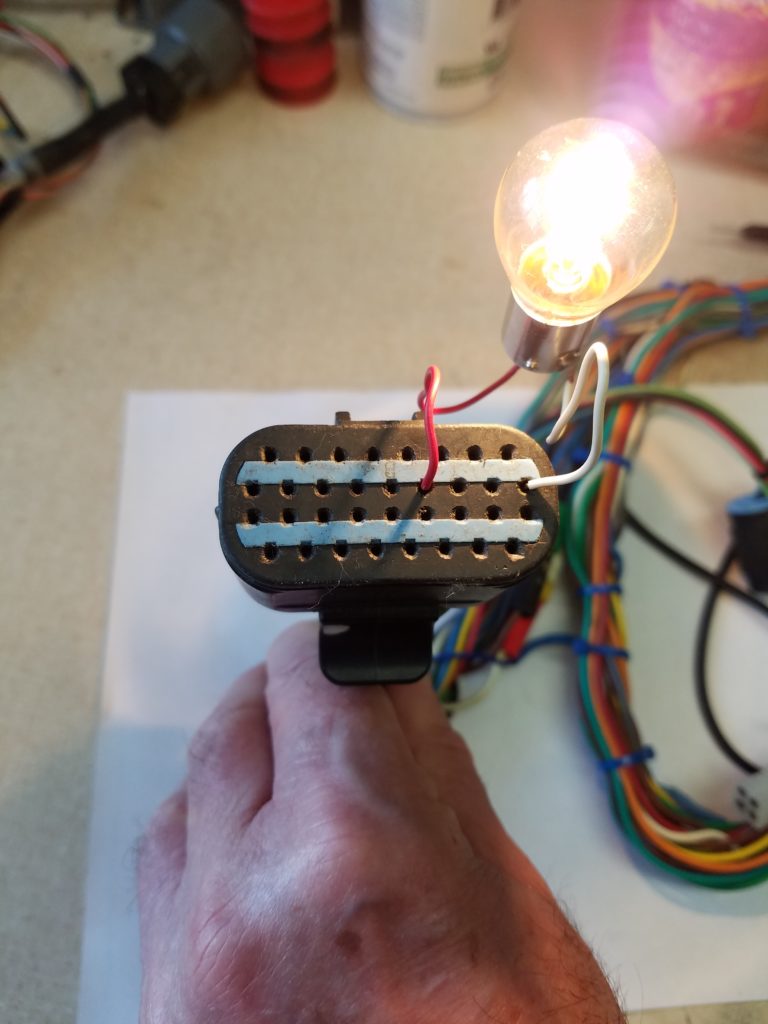
If lamp is bright, the ECU is probably defective unless the display itself is defective. There is no practical method to check display on the vehicle except to swap selector from another vehicle. But, if you do have a remote shift selector, you can check the display using ordinary 9V battery and hookup wire. Remove the two 10 amp fuses from the Vehicle Interface Module (2950986) and connect the 9V battery using bell wire slightly bent on ends; so they can hold inside connector sockets. Negative 9 volt terminal to B connector #9 and 9 volt positive terminal to B connector #2 and A connector #8. After a few seconds remote shift selector should start beeping and show on display “cat eyes “. Just be sure that you have a good connection with wires and sockets.
If display comes “ON”, ECU is defective.
